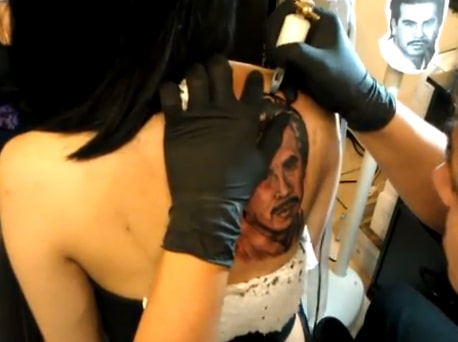
In our previous blog posts done in July we discussed How to Prep and do a Portrait Tattoo. This blog post is a continuation of that one as this is post is a tattoo tutorial about how to do a basic black and gray portrait tattoo.
Black and grey shading is ideal for creating realistic 3 dimensional portraits. Black and grey portraits are also one of the worst looking tattoos if done incorrectly. With that said, if you haven’t much experience in performing a black and grey portrait (which we assume you haven’t otherwise you wouldn’t be here reading this post), you should get a fair amount of practice before you attempt one on skin. There is nothing worse than having an ugly mother scratched onto your clients forearm.
The basic black and gray portrait tattoo requires a bit of planning. The position and location is important, especially if you intend to free hand (which we do not suggest if you are new to this). Plan out where the most important features of the piece will be like the eyes, nose, cheek bones, jaw line, hair line, shadows, etc.. Mark the areas with a skin marker with detailed notations. For a basic black and gray portrait you will need a lining black ink, 3-4 shading blacks and a shading solution to make lighter shades.
One main thing about a black and gray portrait that is different from regular tattoos is that you will be using almost no lining work. The key thing to give the portrait depth is the shading and so instead of lining in areas, you will be shading them in. As soon as you use any lining work on a portrait it immediately turns into a cartoon. This will take away from the realistic look of the portrait.
The best tattoo needle to use for a black and gray portrait is a curve magnum needle. The curve magnum tattoo needle allows you to shade in areas softly and the key to doing a portrait is soft, feathery strokes. At the very end, when all areas are shaded in, you may want to use a small round liner to outline on the darkest shaded areas to give the portrait additional definition. Remember; do not use a round liner needle in the beginning of the tattoo to outline the piece, only shade dark or light to do that.
The technique for shading is to always keep to the surface of the skin. Hold the tattoo machine at an angle and pull the machine lightly across the skin, do not push it. To build contrasts, dip between your lining black and your shading blacks, using the darkest for the shadows and build upwards towards lightness with lesser and lesser shading blacks until at the brightest spots you are only using shading solution. The key is to keep everything as light as possible; you do not want to cause the skin to bleed as this will push out the ink. Keeping it light will also give you some leeway, if it is too light you can always go back and correct it, if it is too deep, there is no going back. Always use a very soft 3-4 ply moist tissue to wipe, do not use anything rough like a paper towel. Most portraits will take a long time to do so wiping with a rough paper towel will increase the chance of damaging the skin and the last thing you want is for the skin to become damaged and bleed out the ink you just layed.
Starting from the edges of the face where there will be most shadow, lightly shade inwards towards the center. Always start from the outside of the face in, filling in more and more details as you go along. Work as if you are building a spider web from the outside in, slowly reaching the center. Always leave the eyes for the last. Mario Barth said that the eyes in a portrait should always go in last because if they went in first, the focus of your work will be around the eyes causing you to pay less attention to the finer details around the face as your working. The finer details individually are not that important but when they all add together, they make the entire face and are arguably even more important than the eyes.